Obama came face to face Sunday with the legions of homeless, consoling the community as it remembered the more than 130 people killed in the storm. The memorial service erupted in cheers when Obama said, "I promise you your country will be there with you every single step of the way," a pledge he extended to all parts of the nation raked by violent storms this season.
The service punctuated a day of remembrance as authorities pressed on with the task of identifying the victims and volunteers combed through the apocalyptic landscape of wrecked neighborhoods where nothing was left whole. Now the following is today's share.
Tipard MOD Converter is specially designed for all video camera fans, and it highly supports Sony, JVC and Panasonic HD video cameras, and can convert TS, MTS, MOD, MOV and many DV files to iPad, iPad 2, iPhone, Samsung Galaxy Tab, etc. Plus, with CUDA technology, it has gained 6X faster converting speed.
Step 2: Load MOD file
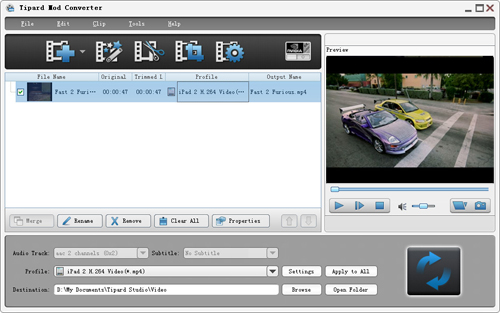
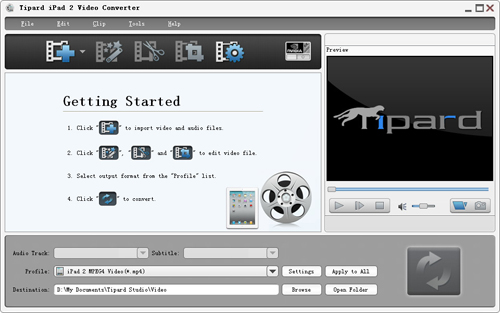
After install, you will see the the following screenshot.

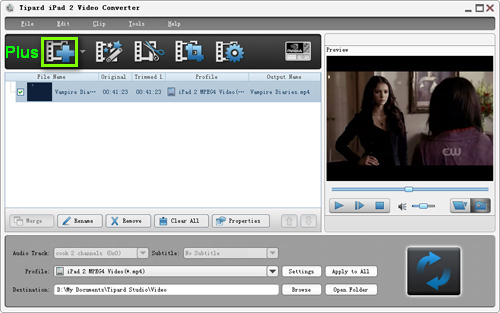
Load any MOD file you want to convert by clicking "Add Video" option under the "File" menu. Or you can click the "Plus" image button in the main interface.
Step 3: Choose output format
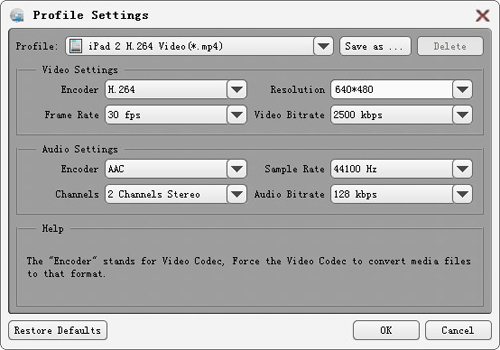
Based on the formats supported by your portable devices, you can select the output format for the movie from the "Profile" column and set the destination folder. Also you are allowed to select your preferred audio track and subtitle for your video.

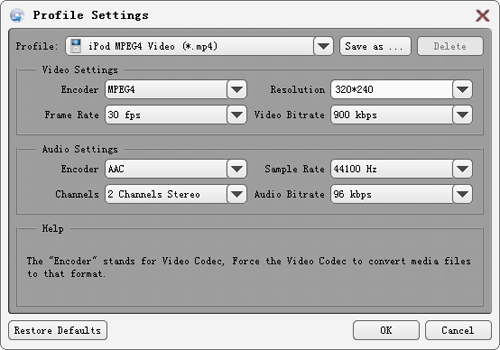
Detailed video and audio settings are provided by this MOD Converter for you to adjust, such as video Encoder, Frame Rate, Resolution, Bitrate and audio Encoder, Channels, Bitrate, Sample Rate, etc. Even more, you can input your own parameters. The well-customized profile can be saved as "User-Defined" for your later use.
Step 4: Edit any MOD file as you like
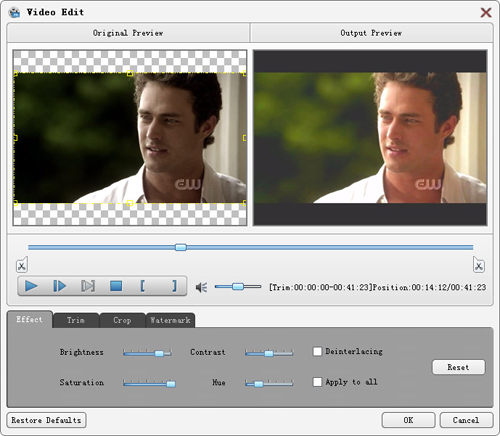
1. Adjust output video effect
Click "Clip" on the initial interface, and choose "Effect" command after context menu popped up to open the Effect window. Or you can just click  button to open the Effect window.
You are allowed to freely drag the Brightness, Contrast, Saturation and Hue 4 Effect scroll bars to choose the perfect video effect you like best.
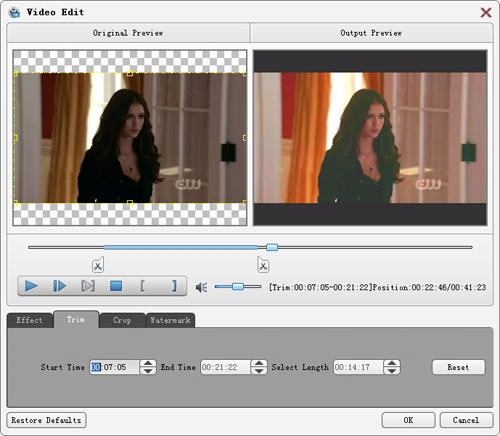
2. Trim any video
Click "Clip" on the initial interface, and choose "Trim" command after context menu popped up to open the Trim window. Or you can just click  button to open the Trim window.
Tipard MOD Converter provides you three methods to trim your video length.
Method 1: Enter the start time in the "Start Time" box, then enter the end time in the "End Time" box and click OK.
Method 2: Drag the scissors bars under the preview window when you want to trim, then the time will be shown in the Start Time box and End Time box for your reference.
After you set the trim time, the length of the captured clip will be shown in the Select Length box for your reference.
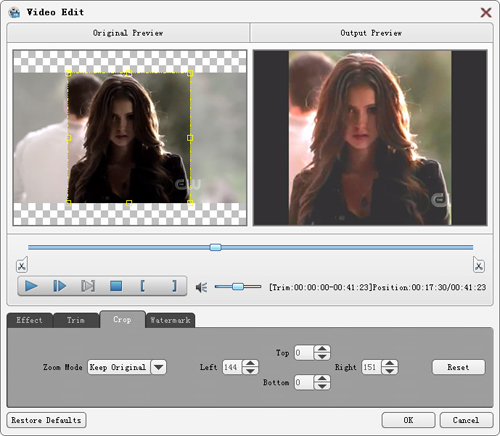
3. Crop any video
Click "Clip" on the initial interface, and choose "Crop" command after context menu popped up to open the Crop window. Or you can just click  button to open the Crop window.
Tipard MOD Converter allows you to remove the black edges around your movie video and customize the size of video play region.
There are three methods available to crop your video:
Method 1:Choose the output aspect ratio from the "Zoom Mode" drop-down list according to your need.
There are four choices available: Full Screen, Keep Original, 16:9 and 4:3.
Method 2: Crop by adjusting the crop frame
The crop frame is the yellow line around the movie video. There are eight small adjustment boxes on the crop frame. Each adjustment box allows you to crop the movie video from a different position. To crop your movie video, you can just move your mouse cursor to an adjustment box and drag the crop frame.
Method 3: Crop by setting the crop values
There are four crop values on the lower right part of the Crop window: Top, Bottom, Left and Right. You can set each value to crop your movie video, and the crop frame will move accordingly.
Note: After you crop your video and set the zoom mode, the result can be previewed in the Preview window of the program main interface.
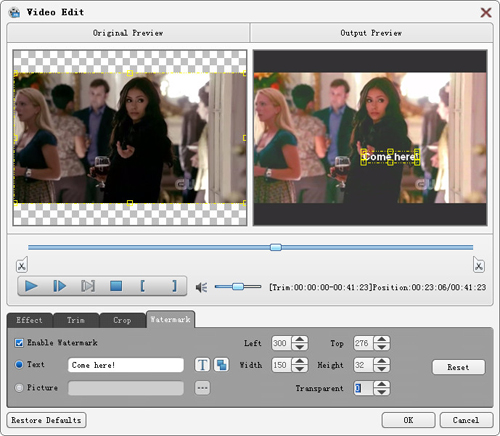
4.Add a text or image watermark
Click "Clip" on the initial interface, and choose "Watermark" command after context menu popped up to open the Watermark window.
Check the "Enable Watermark" checkbox, then select "Text" or "Picture" radio button to add a text or image watermark to any video as you like.
Step 5: Merge multiple video files to a single one
Load more than one video files need to be merged, then select all contents in the display list; after that, the "Merge" button on the initial interface will be activated accordingly.
Then, click the "Merge" button, the temporary file of the merger will be listed in the display list. Then temporary file by defaul will be named "Merge", and you can playing it in the "Preview" window to preview the merger video effect.
Step 6: Capture your favorite pictures when you preview
When you see any wonderful image, just click  button in the Preview window, then click
  button to open the folder to find captured picture.
Step 4: Start conversion
Click "convert" image button to start video converting.


 button to open the Effect window.
 button to open the Trim window.
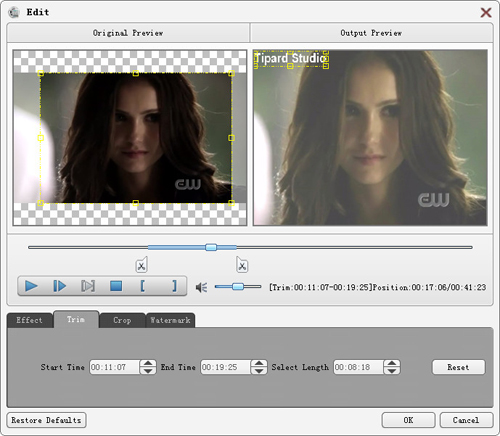
 button to open the Crop window.
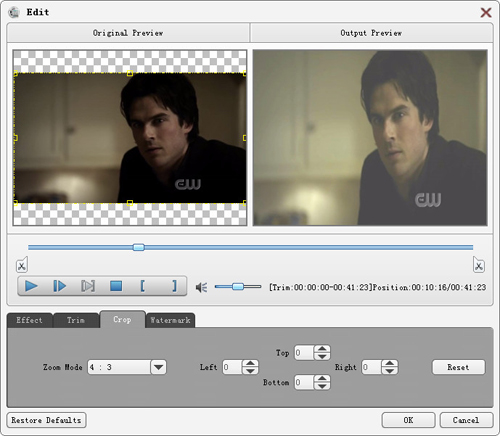
 button in the Preview window, then click
  button to open the folder to find captured picture.